11 Ways to Fold Your Brochure
Designing your job so it folds correctly not only insures that you get the best looking product to show off your design, but also insures that your printer doesn’t pull out their hair trying to make your design work.
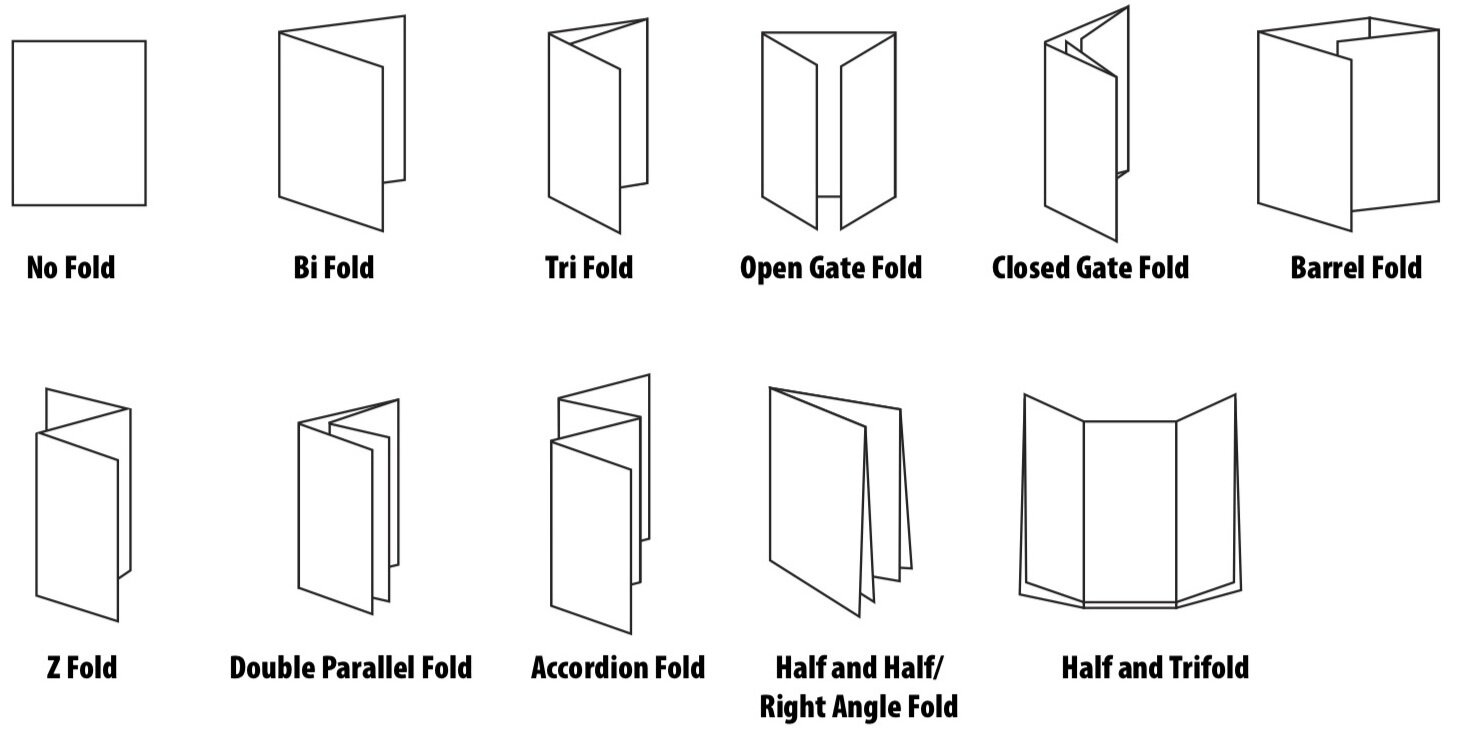
Your “Standard Folds” include 11 options:
Half fold
Tri fold
Gate fold - open
Gate fold - closed
Barrel fold
Z folds
Parallel fold
Accordion fold
Quarter fold
Half and Half fold
Half fold to a Tri fold
You can also come up with anything else your imagination allows. There are two points to keep in my for a good folded brochure:
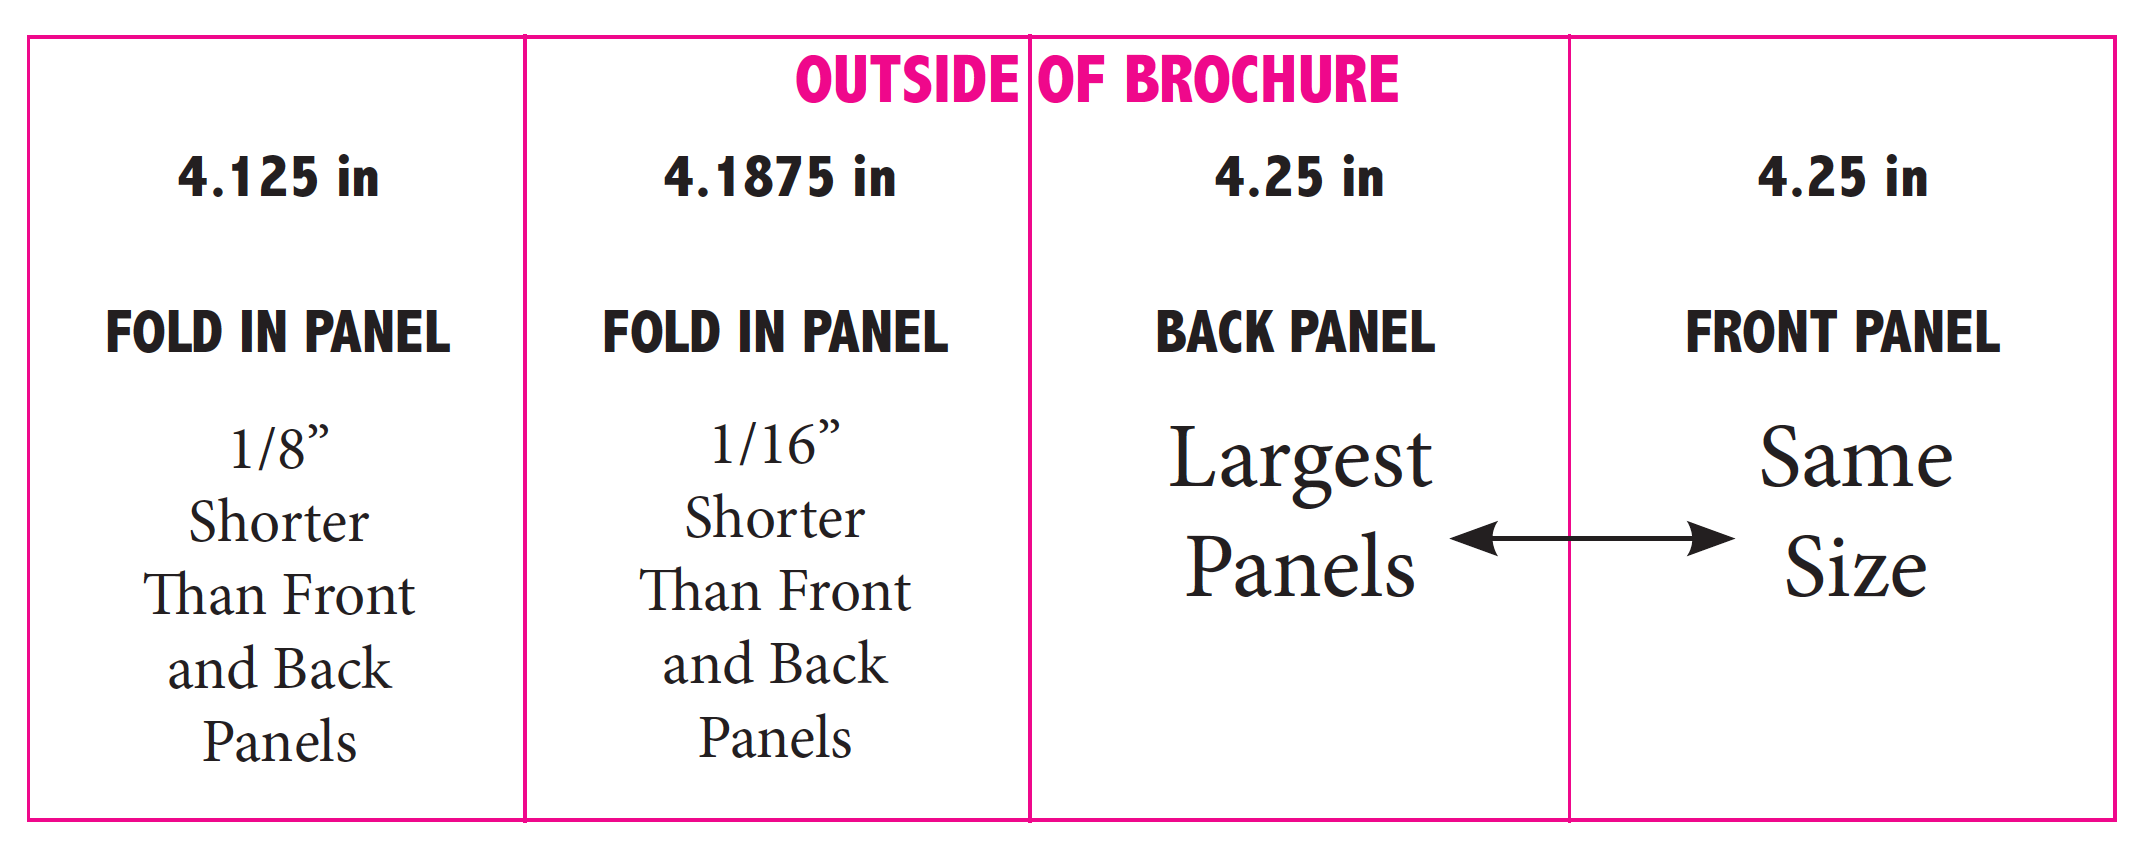
The Front Panel and the Back Panel are your largest panels and MUST be the same size. (In most cases - Open Gate Excluded)
Each Panel that folds in MUST be 1/16 inch shorter than the one next to it (See below)
8 1/2” x 11” Tri fold Panel Sizes
On larger brochures, it is better to make your document size a little smaller to allow for the proper panel sizing.
11” x 17” 4-panel brochure. Make your document 11” x 16.8125”
ALWAYS remember to add plenty of bleed!! Cutters and folders can vary slightly. Give your printer a little play room by making sure you have your document bleed set up correctly at the .125” in all directions.
Make samples, and never be afraid to ask questions. If you are not sure what to make the panel sizes, your printer will be able to help you out. Better to ask before you design it then find out the final product isn’t going to work.


